
[cea-s-02] Sensitivity analysis using Grasshopper and CEA Dashboard (1)
Want to do sensitivity analysis (SA) for your urban design variables? This CEA Lesson introduces a method for SA using Grasshopper and CEA Dashboard.
This CEA Lesson is under the Sensitivity Analysis Module required by the Designer Track and is Optional for the Engineer Track.
Sensitivity analysis (SA) is powerful in helping you study the interplays between, in our field, design paremeters and building energy performance. Thus, we can discover patterns between the two and come up with design guidelines. For example*, if we want to study the interplays between mixed-use designs and the peformance of the thermal network servicing our district, we may want to do the followings. This CEA Lesson guides you through the first two steps for Sobol’ SA.
Generate a variety of mixed-use combinations using Grasshopper;
Assess these designs using CEA Feature - Networks;
Apply SA to the simulated results.
*You can find a similar research work that we have done in Singapore a few year back here.
Before all, what-is-needed?
Before we proceed, pay attention to the following items.
Make sure you have Rhino 8 installed
Make sure you have CEA (Dashboard) v3.35.0 or later installed
Follow-next-steps
Now, follow closely the steps listed below. Throughout the process, it may o
Step 1. Sampling
Define the urban design parameters (i.e. ratios of each use type in a mxied-use design) that we want to study;
Launch CEA Dashboard, and create a new Project;
Then, create a new Scenario by drawing to circle in your study area with the CEA Zone helper;
Now, we can find the zone.shp for this newly created Scenario under Folder {your project}/{this new scenario}/inputs/building-geometry;
Navigate to Generate samples for SA under Tab Utlities;
Set create-scenario-directory to True;
Type in an integer for n **;
Set having-variable-1/2/3/4/5 to True as we need, and define the lower and upper bounds;
Click on Run Script;
Now, we can find the samples generated in File named sampled_variables.csv under the current CEA Project.
** This integer (i.e., n) determines the totale number of combinations to be generated using the Saltelli sampler. CEA uses the Python library of Salib to do so. The total of samples (i.e., combinations) to be generated equals n*(2D+2) samples, where D is the number of variables. We usually decide n considering the computational power. We do not want to generate to many similar samples and increase the computational costs, while we do not want to generate too few samples and lead to difficulties for SA. Hence, we usually start with an n approximately equalling 30 to explore first.

Fig.cea-s-02-01 presents an examplary examplary setting on CEA Dashboard to generate samples for SA. This example studies 2 variables. One variable is floor area ratio ranging from 4 to 25. The other variable is site coverage ratio ranging from 0 to 1.
Step 2. Generate parallel CEA Scenarios
Generate design scenarios feeding in the sampled variables produced in Step 1 (Please note that creating the model that generates such design scenarios at Grasshopper, for example, is not in the scope of this lesson);
Follow Steps 1 through 4 introducted in the previous CEA Lesson to prepare the design scenarios into CEA formats (please note that the zone.shp produced by Step 1.4 can be used as the zone.shp to be loaded into Grasshopper by Step 2 and the reference-shapefile by Step 4 in the previous CEA Lesson);
These scenarios should be stored in the folder diretories of the CEA Scenario created by Step 1.6.
Step 3. Batch process Workflow
It is not possible to simulate all the hundreds of CEA Scenarios produced in Step 2 by sitting next to the computer and manually clicking the Run Script Button. This step introduces our solution for batch processing and CEA workflow design.
All CEA Features including SHP-to-CSV-to-SHP can be batch processed;
Navigate to Batch process Workflow under Tab Utlities;
Set all-scenarios to True;
Set all the CEA Features that we need to True and keep the rest to False (Please note that we need to address the settings for each CEA Feature under the respective tool tabe and Save to Config.);
Click on Run Script;
Now, we can have all the CEA Scenarios under this CEA Project to be executed all at one go.
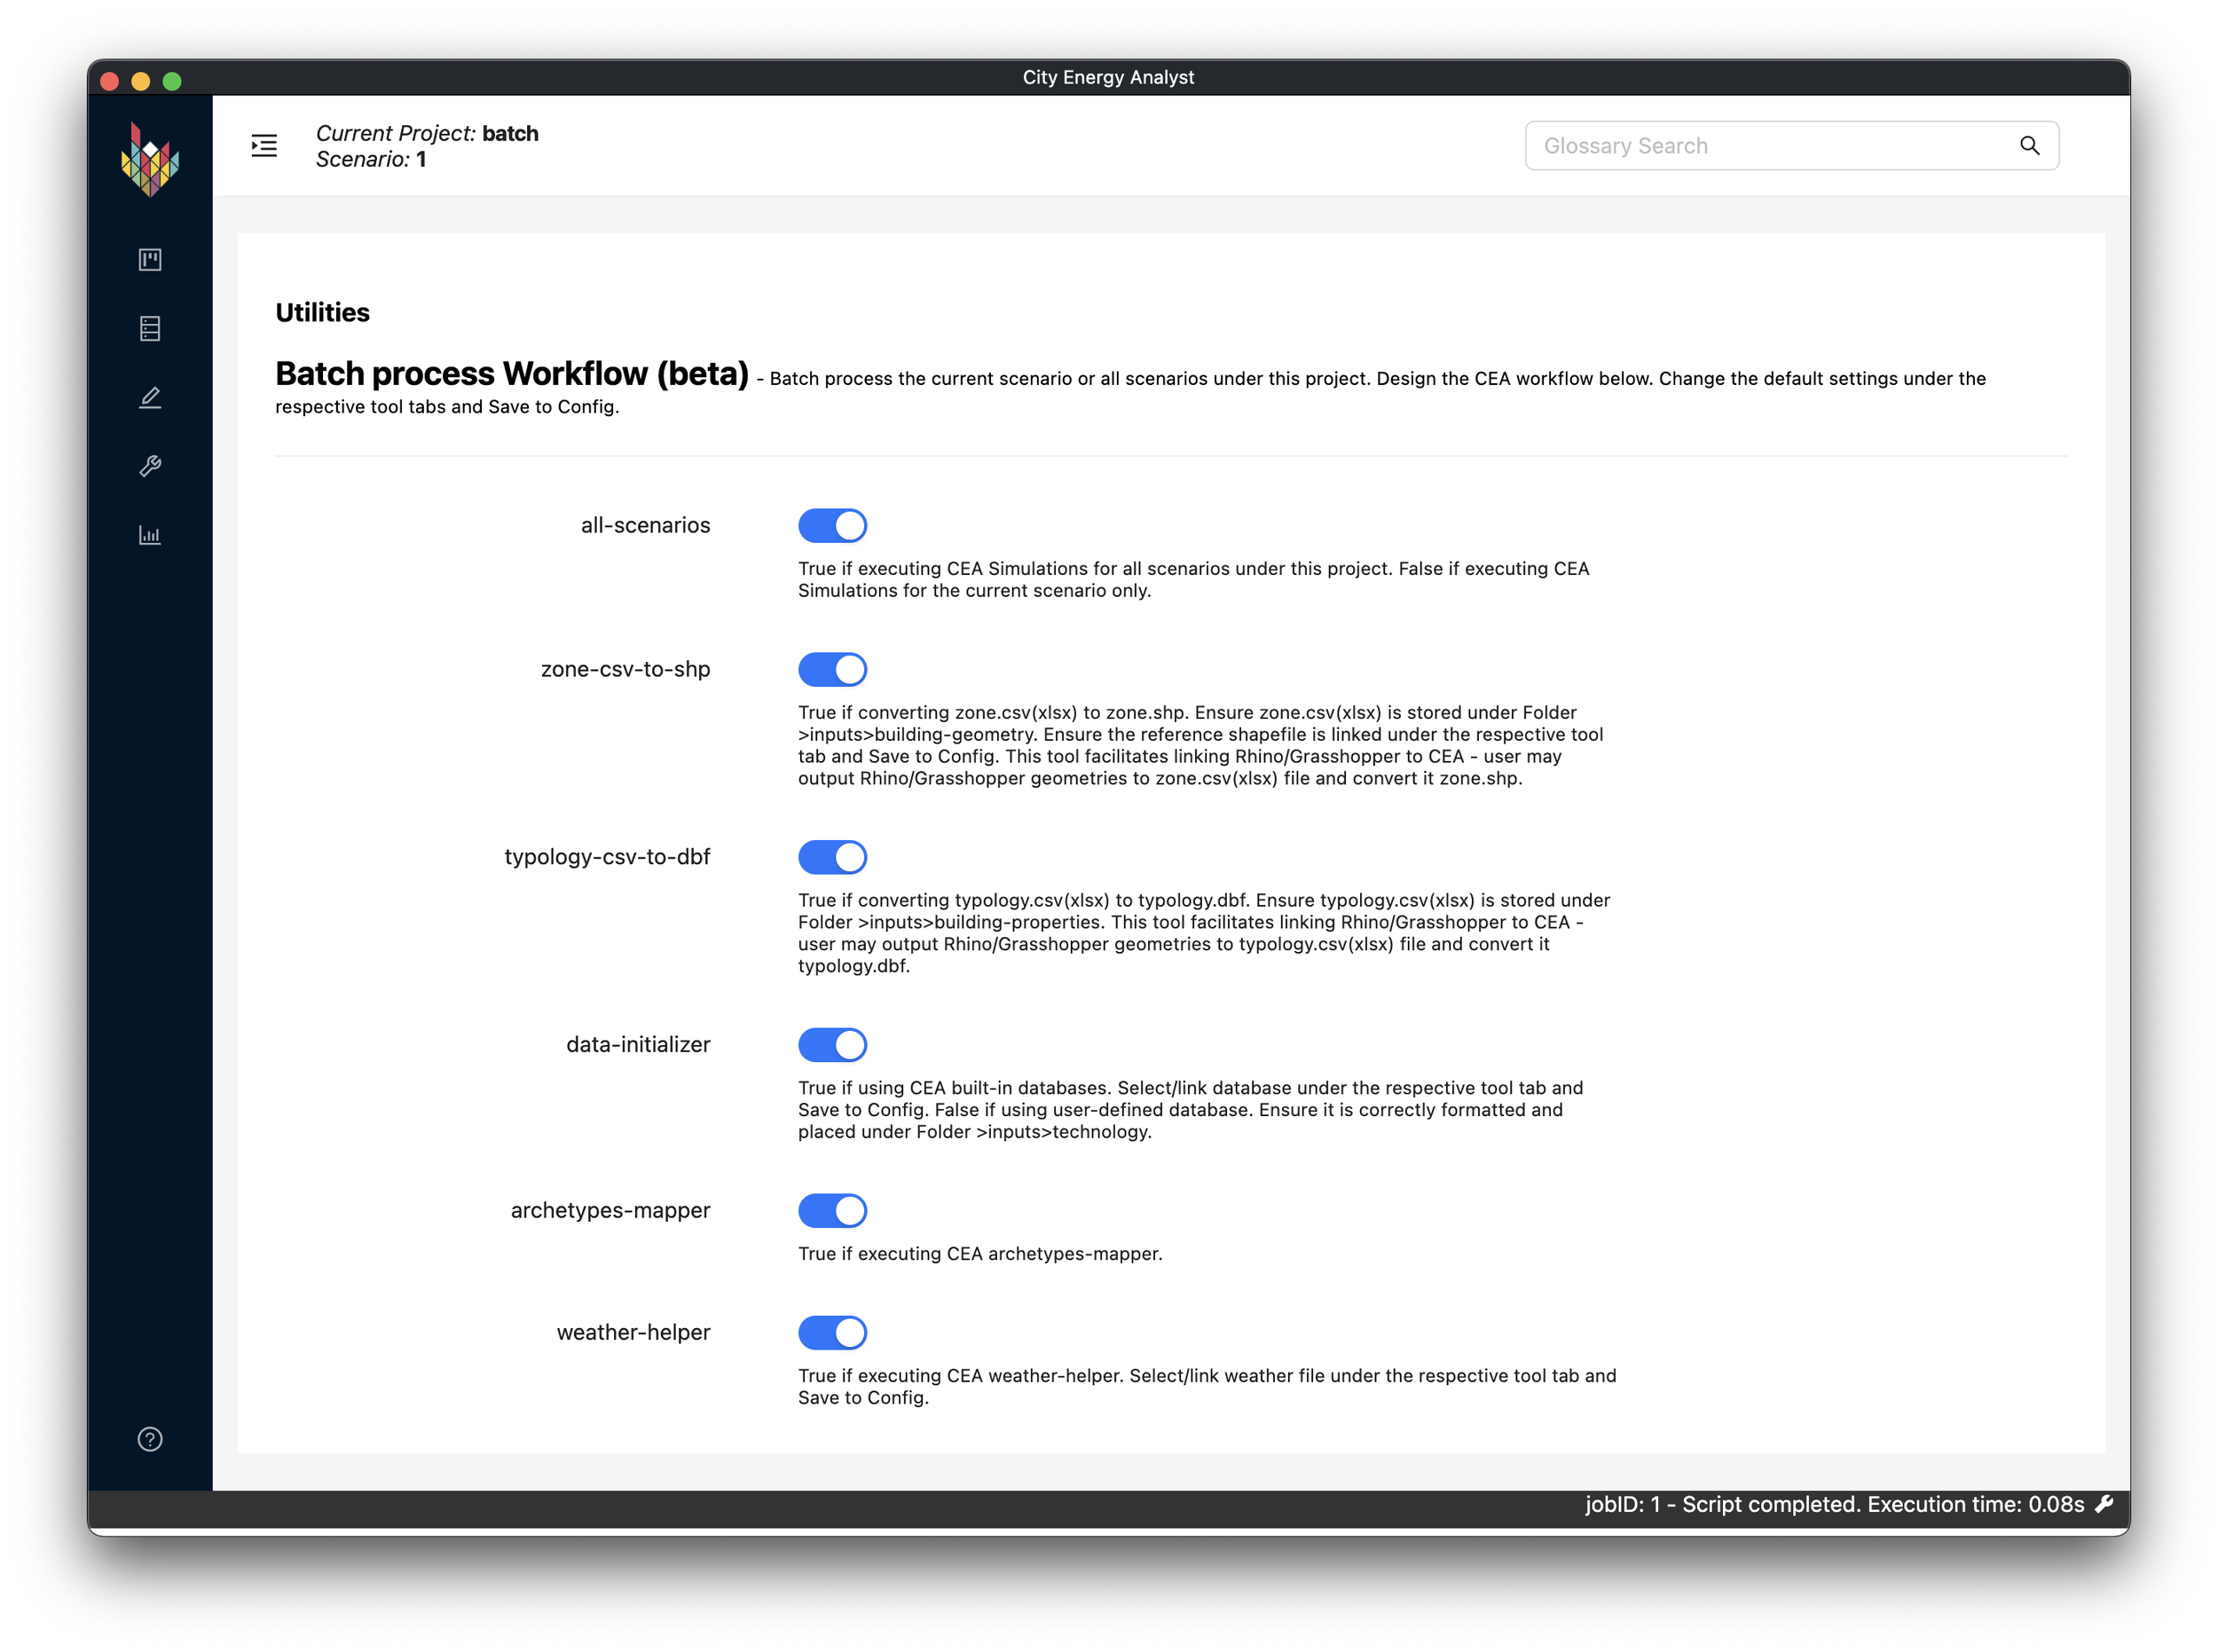
Fig.cea-s-02-02 presents an examplary examplary setting on CEA Dashboard for batch processing and CEA workflow design.
What-is-next?
Obviously, we can also batch process any CEA project even when not doing SA. In the following CEA Lessons under this Sensitivity Analysis Module, I will introduce how to process the simulated results.
Please note that we are still in the progress of testing this Batch process Workflow including this CEA Lesson. Please reach out to us if it is not working or if have suggestions for it.
Questions?
Encountering difficulties or having questions about the processes above? Proceed to the CEA Forum to post your questions. Your questions may be universal and can benefit other CEA users. Please include the Lesson Code [cea-s-02] when posting your question.