
Grasshopper-CEA Part 2: Running CEA commands in Grasshopper
In this post, I am going to introduce how to run CEA commands in Grasshopper. I am using CEA energy demand simulation as an example.
To run CEA energy demand simulations
Please follow the following steps.
1. Make sure the CEA component is installed on your computer. Please refer to my previous post.
2. Make sure the basic input files are correctly stored in the CEA format.
3. Make sure the settings like the weather file, region are correctly set up in the config file.
4. In Grasshopper, link a panel “Scenario=(path to your CEA files)“ to “args“ of the CEA component.
5. In Grasshopper, link a panel “data-helper“ to “script“ of the CEA component.
6. In Grasshopper, link a panel “radiation-daysim“ to “script“ of the CEA component.
7. In Grasshopper, link a panel “demand“ to “script“ of the CEA component.
Now, you should have the results of CEA energy demand simulations in the ‘outputs‘ folder. Check them there!
Step 5 through 7 can be combined together and please refer to the following image for the set-ups.
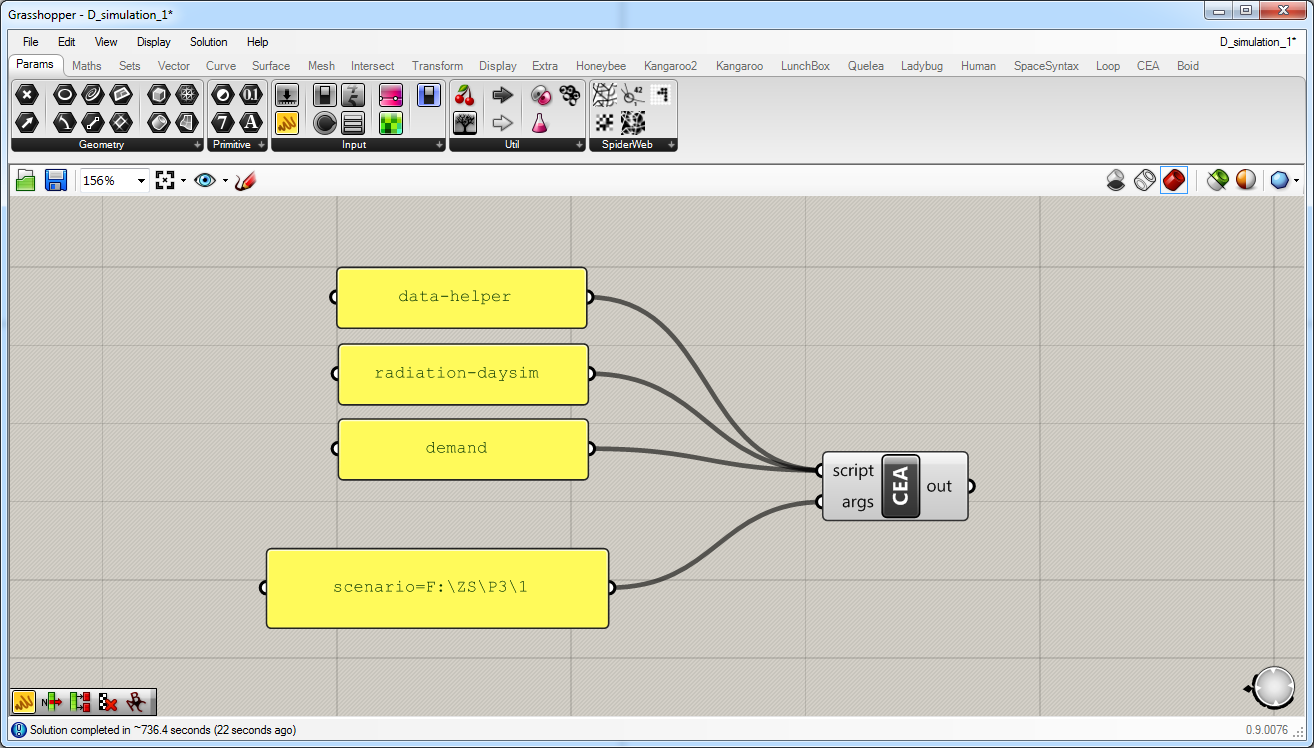
Set-ups in Grasshopper to run CEA energy demand simulations via the CEA component.
Pay attention
To run CEA commands in Grasshopper successfully, please bear the following points in mind.
1. The formats and folder structures of the CEA inputs files have to be exactly as required.
2. The workflow or the order of running the CEA commands have to be exactly the same as running CEA on other platforms.
3. Some CEA command takes several minutes even up to hours, so please wait until your computer responds.
Give it a try and comment below to let me know how it goes.
Next
In the next post, I am going to introduce the method of converting geometries inside Grasshopper to the CEA formats.